- Jun 8
- 9 min read

Travel app development used to mean a dev team, six figures of budget and nine to twelve months of waiting (and working). Now, with an AI app builder, a single founder can ship a working travel app in weeks, not quarters, for a fraction of the cost. The hard part is no longer the building, it's the deciding what to build and getting the integrations right.
This guide walks through the types of travel apps you can build, the must-have features, the development process step by step, what it actually costs and how to ship one yourself. If you're earlier in the journey and want a foundational read on how to build an app with AI before diving in, start there.
Types of travel apps you can build
Not all travel apps are the same and picking the right type is the first real decision in travel app development because it shapes everything everything. Including its features, integrations, cost and who you market to.
Here's the six categories most travel app ideas fall into:
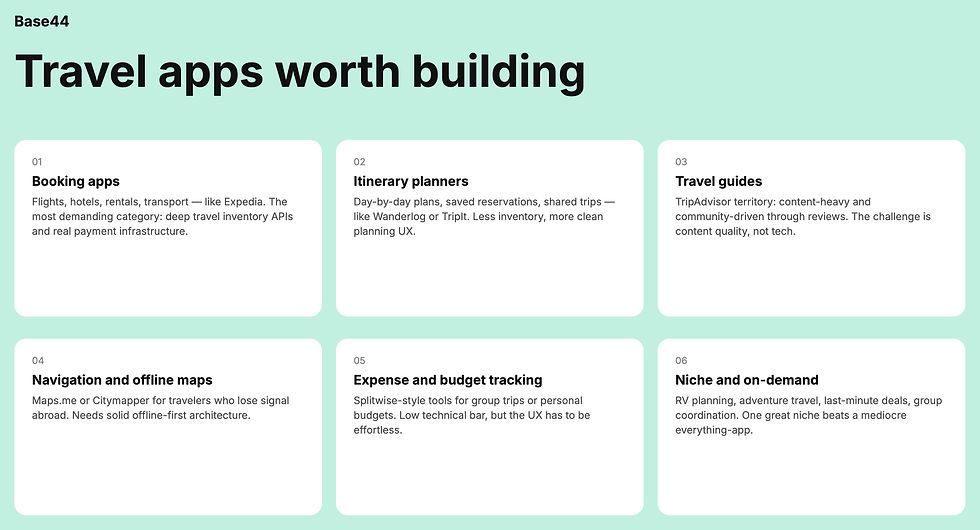
Booking apps: Flights, hotels, rentals, transportation booking, just like Expedia or Booking.com. These need deep integrations with travel inventory APIs and serious payment infrastructure, making them the most technically demanding category.
Itinerary planners and trip organizers: Apps like Wanderlog or TripIt where users build day-by-day plans, save reservations, share trips with travel partners. Less inventory dependence, more focus on a clean planning UX.
Travel guides and recommendations: Think TripAdvisor's territory. These are often content-heavy, often community-driven through reviews and ratings. The challenge is content quality, not technical complexity.
Navigation and offline maps: Apps like Maps.me or Citymapper which are considered useful for international travelers who lose connectivity. As apps these require solid offline-first architecture.
Travel expense and budget tracking: Splitwise-style apps for group trips or personal budget tools. Lower technical bar but the UX has to be effortless or no one uses it past day three.
Niche and on-demand: These are for RV trip planning, adventure travel, last-minute deals, group trip coordination. These often succeed by being narrow and a great app for one type of traveler beats a mediocre app for everyone.
Pick the narrowest type that solves a real user problem, don't try to be all of them in version one.
"App building is no longer just for developers. Platforms like Base44 are changing the game, making it possible for anyone with a great idea to create something meaningful. The key is to start with a clear vision and let the tools do the rest."
— Nina Boyd, PMM at Base44
Must-have features for a travel app
The difference between a good travel app and a great one is feature focus, not feature count. Agency guides love to list 50 features but in reality your first version needs a tight core and you add the rest only when users ask.
Core MVP features: These are the non-negotiables and include, user authentication so people can save their data across sessions. Search and discovery for whatever your app helps people find, a booking or save flow if your app converts on transactions, payment processing if money changes hands, aasic notifications for confirmations and updates. Also a profile or trips section where users can see their saved items. Ship these well, then stop. Learn more about making an MVP to get started.
Advanced features for later: Offline mode (especially valuable for travel because connectivity is unreliable), push notifications tied to location or schedule changes, real-time updates for flight delays, weather, or itinerary changes. Social sharing so users can send trips to travel partners, AI-powered recommendations based on past behavior, multi-language support if you're going international, group trip coordination. None of these are MVP but all of them are reasons users come back later.
Match features to your app type: A booking app needs payment and inventory integration on day one. An itinerary planner can skip both.
"The hardest part of app building is understanding your users. What do they need? What frustrates them? Base44 gives you the flexibility to build apps that truly address those needs, without getting bogged down in the technical details."
— Nina Boyd, PMM at Base44
The travel app development process
Here's the practical steps for building a travel app.
01. Research and scope your app idea
Start with research:
Who is the traveler you're building for?
What do they hate about existing options?
What gap are you filling?
Spend time on app store reviews of competitors as they tell you what users genuinely complain about, which is your opportunity to make something better. The biggest travel app mistakes happen in scope, not code so remember to narrow down your ideas to something that makes sense.
02. Sketch the user flow
Map the main paths through your app by asking how does someone go from opening the app to completing their key action (booking, planning, saving a trip)? You should aim for three to five key screens, sketched on paper or in any drawing tool. This isn't a design deliverable but a thinking tool that catches missing steps before they become rework.
03. Choose your travel app building approach
You have four real options:
Hire an agency (slowest, most expensive, best for complex enterprise builds).
Hire a freelancer or small team (cheaper, slower than you'd hope, quality varies).
Use a no-code platform (fast, limited customization).
Use an AI app builder like Base44 which lets users build apps by describing what they want conversationally, collapsing most of the build work into a discussion. For most beginner travel founders, the AI app builder route is the fastest path to a real product.
Learn more about creating an app as a beginner.
04. Build the core flow first
These could be:
Auth
Search
Main user action
Payment (if relevant)
Don't build everything at once, you need a single complete flow working end to end, then test it with real travelers (friends, family, target users, anyone who actually travels). Real-user feedback at this stage saves weeks later. And the features you thought were essential often aren't, the friction you didn't notice will be obvious.
05. Add integrations and polish
Once the core flow works, layer on payment providers, mapping, third-party travel APIs, push notifications and analytics. Each integration adds value and adds failure modes, so add them deliberately, one at a time. Test each before moving on and by the end of this step you should have a working travel app.
Key integrations every travel app needs
Travel apps live or die by their integrations and skipping this conversation is one reason agencies pitch huge budgets for app development, since most of the cost is plugging in third-party services.
Here are the main app development costs:
Payment processing: Stripe is the default for almost every travel app that handles money. It supports global cards, refunds, and the complex pricing models travel needs. Learn more about the Base44 and Stripe integration.
Maps and navigation: Google maps, for example, handles location, routing and place search.
Flight and hotel data: This is where travel app development can get expensive. Most integrations and APIs for this have approval processes and minimum commitments.
Authentication: Auth0, Firebase Auth or Clerk handle login, signup, password reset, and social auth. Don't build auth yourself for a travel app because the edge cases will eat you.
Push notifications: OneSignal or Firebase Cloud Messaging deliver booking confirmations, flight delay alerts and re-engagement messages. Most travel apps lose users in week two without notifications, so this isn't optional.
AI features: Pre-trained language models for itinerary generation, destination recommendations and natural-language search. Plug-and-play through APIs, no custom training required for most use cases.
Base44's connectors plug in tools and services users already use in one click, which removes most of the wiring work that traditionally turns integrations into the slowest part of the build.
How much does travel app development cost?
Cost depends entirely on which path you take. Here are the approximate ranges for each, based on what gets quoted in the market"
Agency development: Typical range is US$50,000 to $300,000 for a travel app, depending on feature scope. A standard MVP from a US or European agency runs $80,000 to $150,000. Offshore agencies quote lower, often $30,000 to $80,000, with the trade-offs you'd expect around communication and quality.
Freelancer or small contractor team: Typically $20,000 to $80,000. This means better budget control than an agency but more management overhead falls on you. Quality also varies dramatically by individual.
AI app builder: A fraction of the above, you can build an app for free or opt for a builder subscription that covers integration costs (Stripe fees, API access, hosting) as well.
Where the money goes in traditional app building:
Design takes 10 to 15%.
Frontend development takes 25 to 30%.
Backend development takes another 25 to 30%. Integrations take 10 to 15%.
QA and testing take 10 to 15%.
Project management takes 5 to 10%.
An AI app builder collapses most of these into the platform itself.
How to build a travel app with Base44's AI app builder
Here's the practical version, step by step. You can have something working in an afternoon and a polished version in a couple of days-weeks.
Step 1: Describe your travel app in plain language. Open Base44 and write what you want: the type of app (booking, itinerary, guide), who it's for and the core features. The more specific you are about the user and the problem, the better the result.
Explore these app building prompts to get started.
Step 2: Review the generated app and refine, you'll get initially get a working UI and backend. Walk through every screen and anything that's off, describe the change conversationally: 'make the search results show three results per row, not two,' or 'add a filter for price range.'
Step 3: Connect integrations. Payments (Stripe), maps (Mapbox or Google), travel data APIs (Skyscanner, Amadeus or whatever fits your app type), authentication and notifications. Most of these connect through one-click connectors, test each one as you add it.
Step 4: Test with real users on your live URL, Base44 gives you a working link the moment you start. Send it to five to ten target travelers and watch them use it (or have them screen-record). Iterate based on what you see, not what they tell you.
Step 5: Launch publicly when you're confident, then keep iterating. The first version is never the final version. Travel apps especially benefit from continuous refinement based on real trip data. For more detail on the whole flow, our guide on how to use an AI app builder walks through it end to end.
If you want a head start instead of building from scratch, Base44's app templates marketplace offers pre-built app templates for common use cases, which can save you the first day or two of work.
"One of the most powerful things about Base44 is how it democratizes app building. You don't need a massive budget or a team of developers to create something impactful. It's a game-changer for small businesses and solo entrepreneurs."
— Nina Boyd, PMM at Base44
Common mistakes when building a travel app
Travel app development has predictable failure modes, we rounded up the ones to avoid:
Building for every traveler instead of one type.
Business travelers, backpackers, family vacationers and luxury travelers want completely different things, so pick one.
Skipping offline mode, connectivity is unreliable when people travel. Apps that need data to do anything useful get deleted in week one of an international trip.
Over-engineering the booking flow before validating demand. Beautiful checkout means nothing if no one wants to book so always validate the demand with a simpler flow first.
Ignoring data privacy, travel apps collect sensitive information: passport data, payment data location history. This means GDPR, CCPA and other regulations apply. Always design for compliance from the start.
Treating integrations as an afterthought. Travel apps are mostly integrations. Plan them during scoping, not when you're already three months in.
Launching without analytics because without analytics you fly blind. Set up basic event tracking before launch so you know what users actually do, not what you hope they do.
FAQ about travel app development
How long does it take to develop a travel app?
Traditional development with an agency takes 4 to 9 months for an MVP. With a freelancer or small team, expect 3 to 6 months. With an AI app builder, indie founders typically ship a working travel app MVP in 1 to 4 weeks, or even less. Adding deep integrations (flight inventory, complex pricing) extends any of these timelines.
Can I build a travel app without coding?
Yes, AI app builders generate the UI, backend, and integrations from natural language descriptions, so you can build a working travel app without writing code. No-code platforms also work for simpler use cases. Complex enterprise travel apps with custom AI models still benefit from traditional development. Learn more about building an app without coding.
What's the best way to monetize a travel app?
The four common models for monetizing an app: commission on bookings (the Expedia model), subscription for premium features (the Hopper Premium model), affiliate revenue from hotel and flight links (the TripAdvisor model), and freemium where core features are free and advanced ones are paid. Most successful travel apps blend two or three. Pick based on your user, not what looks profitable on paper.